Marquee tool is a selection tool in Photoshop. You can use this to select all or a part of an image. Let’s start to know how it works.
Steps to use Marquee Tool
1. First of all make the tool active by clicking on it or press the key on the keyboard that is assign to a particular tool like M for marquee tool.
2. To know these shortcut keys just mouse hover to the icon of any tool and in the tool tip there is a letter after the name in the bracket.
3. By default there is rectangular marquee tool. You can choose other one like circular marquee tool etc. by pressing right click on it and select the one you want.
4. For working with it just open an image and take the cursor to that image. When you go to image your cursor will change to a plus sign. It means you are ready to select an image.
5. When the cursor is ready to select then just press click on the part of area of image you want to select and drag the cursor holding the click pressed in any direction where you want to select the area of an image.
6. When your selection is completed just release the pressed key. Now a black white dotted line appears on the image as shown in image below.
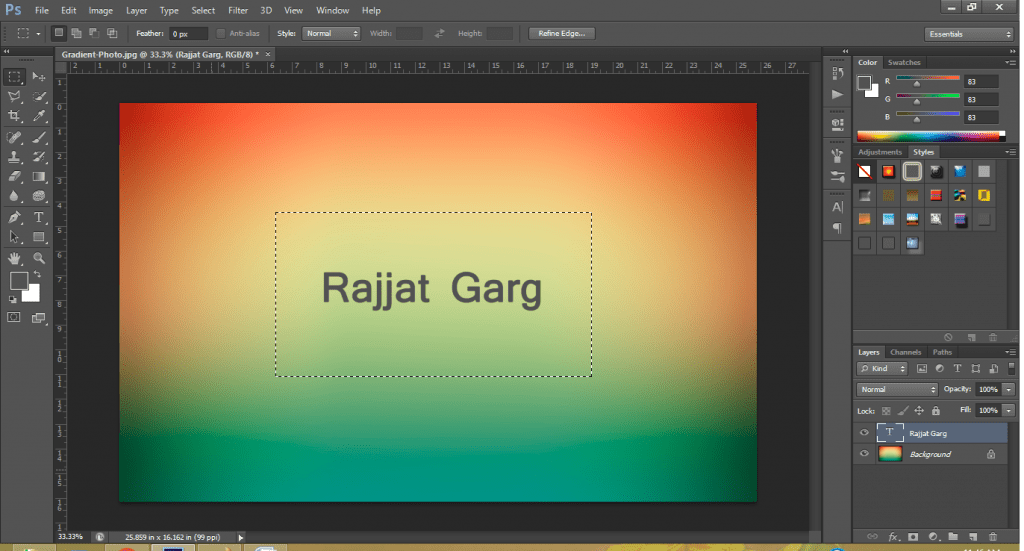
It shows you the selected area of your image. Now you use this selection for your purpose like move, delete etc. You will get more use of it further as we proceed for editing purpose. This is not enough a lot of functionality is there in marquee tool that we will discuss in our next sections.
Add & Subtraction to Selection
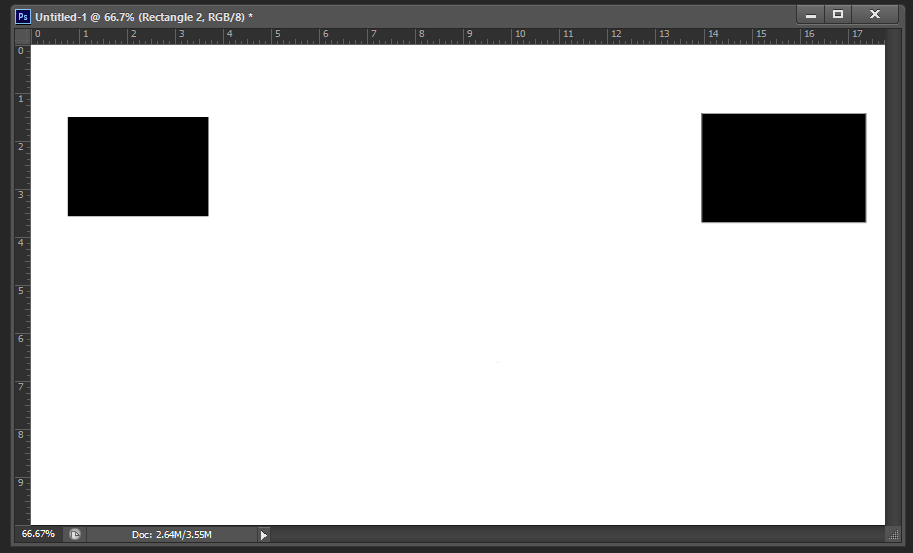
Let’s discuss about how to select a part of an image. Now, think that if we have more than two things in a same image and we have to select both of them. E.g. in the below image we have two black box and we have to select both. Just try to select the both.
I think you are unable to do it (until unless you are not new to Photoshop) because if you go to select the second one then the other will deselect automatically.
We have talked about the various things in the starting like menu bar, toolbox & presets. Now did you notice that whenever we select a tool, there are a no. of other functionalities about the tools which are shown just below the menu bar. The bar shown in the red box below, shows the functions according to the corresponding selected tool. Here we have select marquee tool then it is for marquee tool.
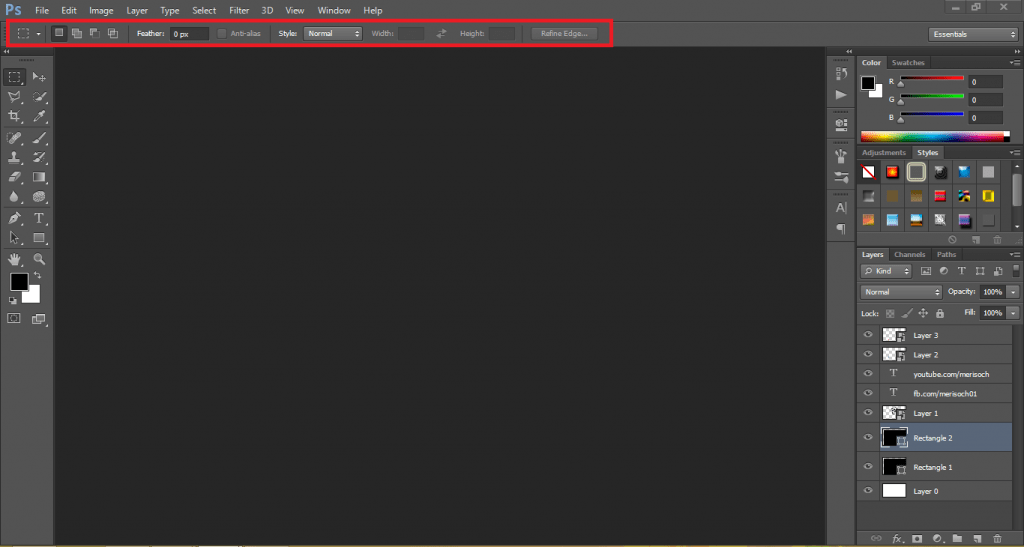
Now, if you look carefully then first there is set of four icons. Here we discuss one by one.
1. The first one is selected & this is new selection. Which means every time whenever you click and drag the mouse a new selection will made or we can say this is normal selection.
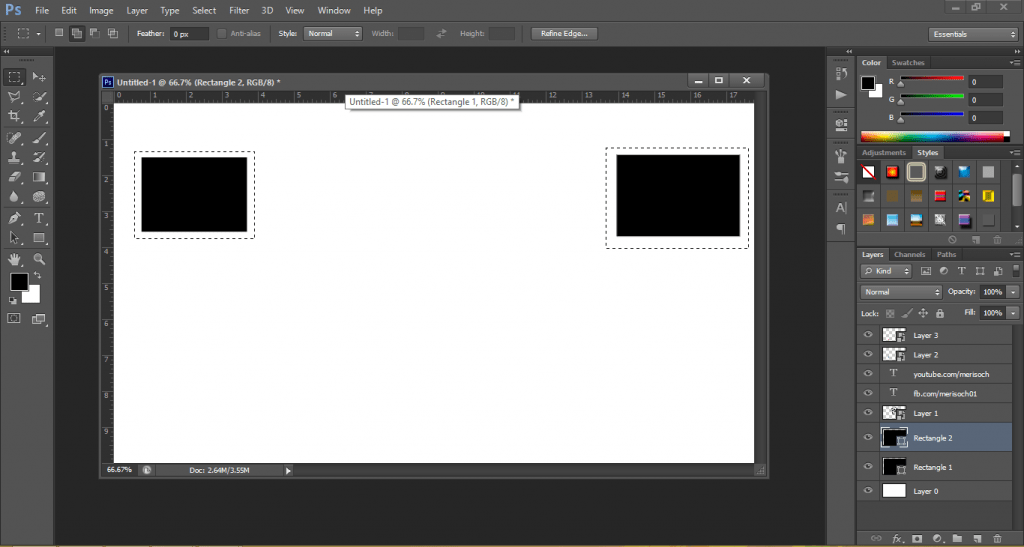
2. The second icon shown is add to selection. Now, this is also the solution of the question which I ask you to try i.e to select two distant objects in a same image. To activate, first click on icon then go for selection. When you have add to selection cursor then a little plus sign in also shown while making selection. Look at the image below to selections are made around the black boxes.
3. The third icon shown in the image is subtract from selection. With this tool you can subtract the additional part of an image. Consider that box in the image is made of four little box then it is possible to select any three. Image show below shows how we make select three part of box from the four parts. First selection is simple and we select the whole box. Then we start selection from the fourth part to deselect the selected part.
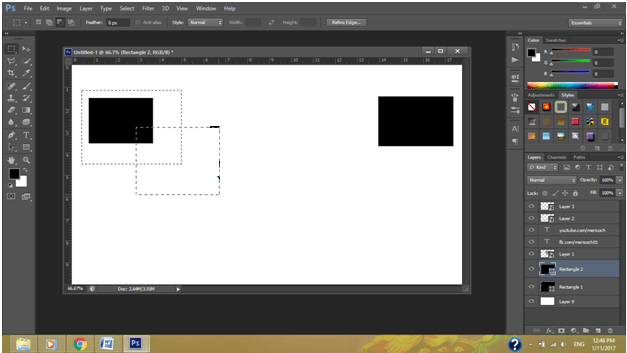
When I will release the button then the selection of the box will look like this.
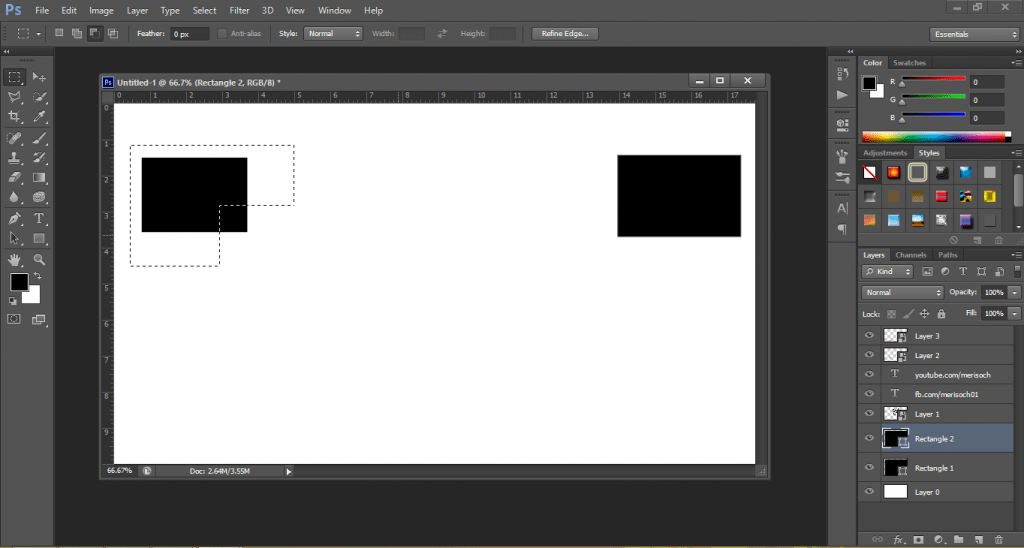
So, this is the way to subtract from selection.
Intersection & Feather Tool
Now lets take a look at some more functionalities about the marquee tool. Look at the blue bar shown in the image. We cover all about these tools in this section.
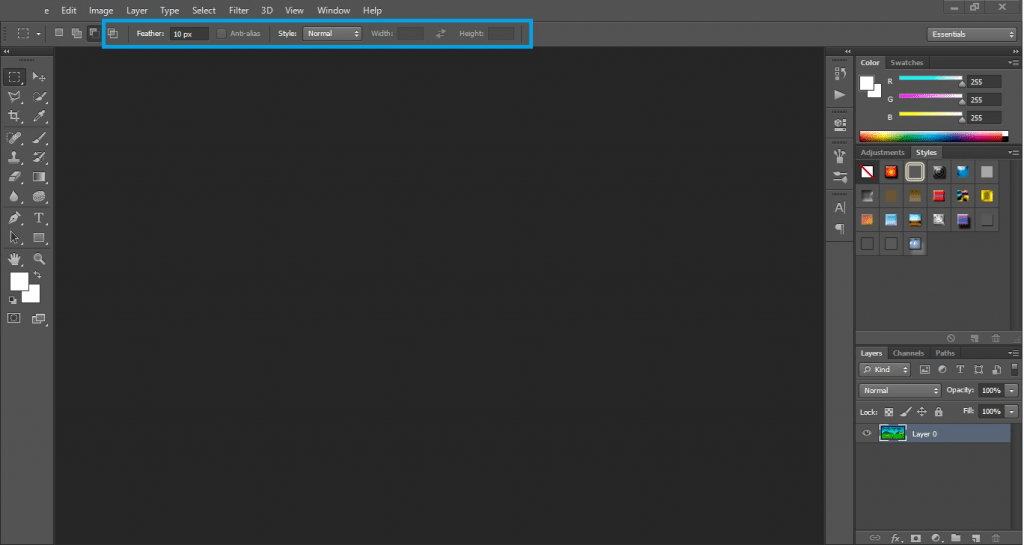
The first icon in the blue bar Intersect with selection. As the name clears that it is the selection whose output is the intersection of two selection. Following are the steps to use that tool
- First of all make a selection to an image.
- Now, choose the intersection with selection tool and try to select area of an image. (Please make sure that this time your selection intersect the other one).
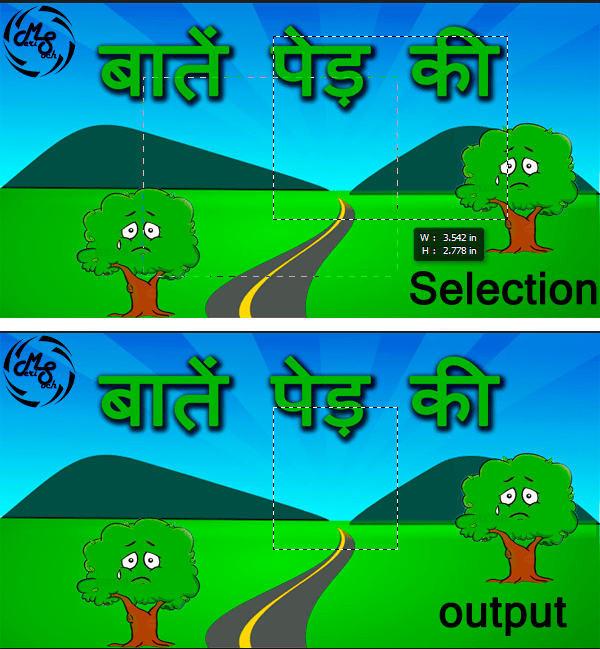
- After leaving the selection, you will notice that the only part remains in the selection is the common part of two selection that are made by you. (Image below shows the intersect with selection)
Next tool is feather. Feather tool is used for making the selection better or providing the outer glow. A cool cut out is come by using feather tool. Following are the steps to use it.
- First of all make select the marquee tool.
- Before making any selection, enter the amount like 10, 20 px in the box along with feather.
- Lower the value get the higher opacity & higher the value gives lower the opacity of layer cut out. Similarly, higher the value also gets the corners more round & vice versa.
- Press Ctrl+A to select all the area & select subtract from selection(area you want to keep in image).
- Now press delete. You will see a outer glow which makes an impression of smoother edge.
- Both the output are shown to you below, one using feather & other without feather tool.
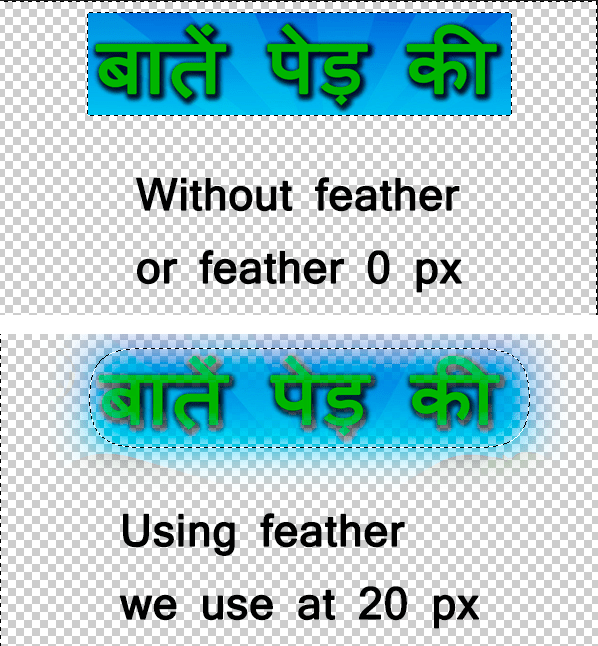
This is the just way to use. Now its upon you & your imagination i.e how you use it. Hope you guys you able to understand about this effect.
Selection Constraints
As we know that while selecting we have some measurement or ratio in which we have to select the image. While doing that there may be mistake from us may be a little bit part we more or less. To select an appropriate dimensions we have some constraints.
Let’s us how to use it. A style bar shown in the image below to you in the red box is for constraints. By default this is normal but we can choose other too like fixed ration and fixed size.

Normal – As we know whenever we select it’s free style i.e any width with any height. There are no constraints on the selection. Just click, hold & drag and select whatever and how much you want.
Fixed Ratio – In this style the selection is made within a ratio. Like if you put (3:4) then the image will be selected like (300px X 400px), (1200px X 1600px) and much more in the same ratio. Following are the steps to use fixed ratio.
- First of all select the fixed ratio under the style tab.
- When you select the fixed ratio, both blurred width & height boxes becomes active and able to take the value.
- Now, put the value in these boxes according to your need. Like if you want a square just enter 1 in width & 1 in height. If you now try to select you will see that the selection will be square only.
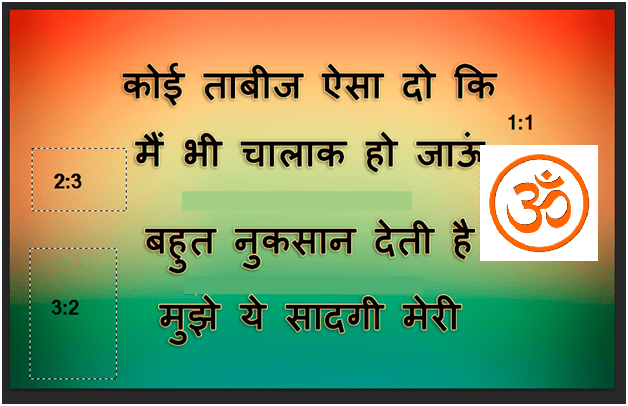
So, this very easy & useful while we have to make an image in constraints. Like for HD image we use 16:9 canvas. Below image shows you various fixed ratio selections.
Image below shows the fixed ratio constraints.
Fixed Size – Fixed size is also similar to fixed size but here you put the height & width in pixels instead of their ratio. Let’s show you how to use it.
- First of all select the fixed size under the style tab.
- When you select the fixed size, both blurred width & height boxes become active and able to take the value.
- Now, put the value in these boxes according to your need. Like if you want an icon size image then just enter 64px in height & 64px in width. (Any value can be entered in height & width according to your use.)
- Now just click on the image a fixed size selection is made and you can move it where you want using the move tool.
The image below shows the fixed size ( in pixels) constraints.
This is all about the marquee tool. Hope you have enjoyed this.


